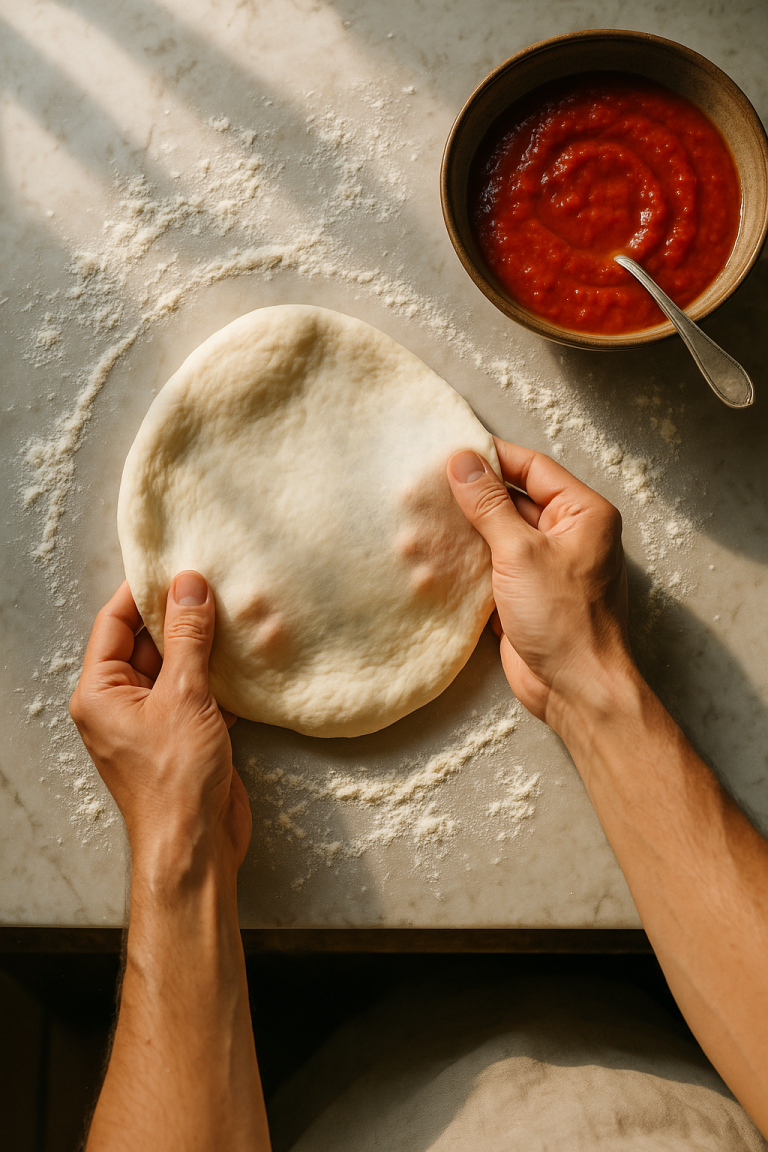
Mountain Morning Sourdough (Two Methods)
This is a 66% hydration sourdough that actually works at 7,000 feet. I use a 50/50 blend of AP and bread flour because pure bread flour is too strong at altitude. You can bake it same-day if you’re around all day, or mix it after dinner and bake it in the morning. Either way, you get a dark crust and open crumb.

Mountain Morning Sourdough (Two Methods)
This classic French-style sourdough is adapted for Park City's 7,000-foot elevation, with two timing methods to fit your schedule.
Ingredients
Method
METHOD 1: SAME-DAY BAKE
Same-Day Instructions
- Feed Your Starter (Night Before or Early Morning)
- Starter preparation: Feed your starter 8-10 hours before mixing. For an 8:00 AM mix, feed around 10:00 PM the night before, or feed at midnight for an early morning mix. It should be at peak activity—doubled in volume, bubbly, and domed on top.
Mixing the Dough (8:00 AM)
- Autolyse – 60 minutes: In a large mixing bowl, combine both flours, the active starter, and warm water (75-85°F/24-29°C). Mix with your hands or wooden spoon until no dry flour remains. The dough will be shaggy.
- Water Temperature Note: Use 75-80°F water for faster fermentation, especially in cooler months. In summer or if your kitchen is warm (above 75°F), use 70-75°F water. Do not exceed 90°F—you'll risk stressing the yeast.
- Cover and rest: Cover in a 6 quart Cambro or with a damp towel and rest for 60 minutes. This extended autolyse maximizes gluten development and extensibility for same-day baking.
Add Salt and Begin Bulk Fermentation (9:00 AM)
- Add salt: Sprinkle the 9g sea salt evenly over the dough surface.
- Pincer method: Use a pincer grip (thumb and fingers) to cut through the dough repeatedly, squeezing and folding to incorporate the salt evenly. Work for 3-5 minutes until salt is fully distributed and dough feels slightly tighter. The dough will become more cohesive.
Bulk Fermentation – Greenway Method (9:00 AM – 1:00-2:00 PM)
- First fold (9:30 AM – 30 minutes after adding salt): With wet hands, perform a stretch-and-fold or coil fold. Gently stretch one side of the dough up and fold it over itself. Rotate the bowl 90° and repeat 4 times total. The dough should feel slightly elastic. Cover and rest.
- Second fold (11:00 AM – 90 minutes later): Check fermentation progress. The dough should be gaining strength and showing early air pockets. Perform another series of folds. If the dough feels tight or resistant, skip this fold and wait. Cover and rest.
- Third fold (12:00 PM – 60 minutes later): Check dough ripeness (see notes below). If it's still gaining volume and feels strong but not tight, fold once more. If it already shows signs of being ripe, skip the fold and move to shaping.
- Monitor ripeness (12:00-2:00 PM): Total bulk fermentation is typically 4-5 hours at Park City altitude. Watch for these signs:
- Dough has increased 30-50% in volume
- Soft, stretchy, and bouncy texture
- Visible bubbles throughout
- Passes the windowpane test (stretch a small piece thin without tearing)
- Domed surface, jiggles when bowl is shaken
Shaping (1:00-2:00 PM)
- Pre-shape: When bulk fermentation is complete, turn dough onto a lightly floured surface. With wet hands, gently pre-shape into a loose round without deflating. Handle gently to preserve air pockets.
- Bench rest: Cover with a towel and rest 20 minutes.
- Final shape: Shape into a tight boule, creating surface tension. Place seam-side up in an 8-inch round banneton or floured bowl. Cover with cloth.
Final Proof (1:30-3:30 PM)
- Room temperature proof: Proof at room temperature (68-72°F) for approximately 2 hours. Warmer kitchens may need only 90 minutes; cooler may need 2.5 hours.
- Poke test: Gently press the dough with a floured finger. It should spring back slowly, leaving a slight indent.
Baking (3:30-4:30 PM)
- Preheat oven: One hour before baking, preheat to 475°F with baking steel on middle rack.
- Turn out and score: Dust loaf with rice flour, invert onto steel peel. Score with lame.
- Load and steam: Slide loaf onto preheated steel. Immediately reduce oven to 450°F. Spray loaf and oven walls with water (3-4 sprays). Close door quickly.
- Bake: Bake at 450°F for 20 minutes, then rotate. Continue baking 20-25 minutes more, checking every 2-5 minutes. Target: deep mahogany crust, 200-205°F internal.
- Cool: Transfer to wire rack. Cool at least 1 hour before slicing.
METHOD 2: OVERNIGHT COLD FERMENTATION
Feed Your Starter (9:00-11:00 AM)
- Morning feed: Feed your starter 8-10 hours before evening mixing. For a 6:00-7:00 PM mix, feed between 9:00-11:00 AM. It should be at peak by evening—doubled, bubbly, domed.
Mixing the Dough (6:00-7:00 PM)
- Autolyse – 30 minutes: In a 6 quart Cambro or a large mixing bowl, combine both flours, the active starter, and cool-to-room-temperature water (60-75°F/15-24°C). Mix until no dry flour remains.
- Water Temperature Note: Use 65-70°F water for overnight method. You're only doing 2-3 hours at room temperature before refrigerating, so you don't need warmer water to accelerate fermentation. The cold fermentation will do the work. Avoid water warmer than 75°F for this method.
- Cover and rest: Cover with damp towel and rest for 30 minutes. Shorter autolyse is sufficient since you'll get 8-12 hours of cold fermentation.
Add Salt and Begin Bulk Fermentation (6:30-7:00 PM)
- Add salt: Sprinkle the 9g sea salt evenly over the dough.
- Pincer method: Use pincer grip to incorporate salt, working 3-5 minutes until evenly distributed.
- Bulk Fermentation – Room Temperature Phase (7:00-9:30 PM)
- First fold (6:45-7:15 PM – 10-15 minutes after adding salt): With wet hands, perform stretch-and-fold. This helps fully incorporate the salt and builds initial structure. Cover and rest.
- Second fold (7:30-8:00 PM – 30 minutes later): Fold again. Dough should be gaining strength and cohesion. Cover and rest.
- Third fold (8:00-8:30 PM – 30 minutes later): Final fold. Check that dough has visible bubbles beginning to form and feels elastic and cohesive. Cover and rest.
- Rest before refrigerating (8:30-9:30 PM): Let dough rest 30-60 minutes after final fold. You want to see early fermentation activity—small bubbles, slight increase in volume, bouncy texture.
- Into the Refrigerator (9:00-9:30 PM)
- Cover tightly: Transfer bowl to refrigerator. Cover tightly with plastic wrap or tight-fitting lid to prevent dough from drying out.
- Cold bulk fermentation: Refrigerate 8-12 hours at 36-40°F.
- Minimum: 8 hours (faster schedule)
- Ideal: 10-12 hours (best flavor)
- Maximum: 16 hours (if needed)
DAY 2 – MORNING SESSION
Shaping (6:00-7:30 AM)
- Remove from refrigerator: Take dough out. It should have increased 30-50% in volume, feel puffy, and show visible bubbles throughout.
- Pre-shape immediately: Turn cold dough onto lightly floured surface. With wet hands, gently pre-shape into a loose round. Work quickly—cold dough is easier to handle.
- Bench rest: Cover with towel and rest 20-30 minutes. This allows cold dough to relax and warm slightly.
- Final shape: Shape into tight boule. The dough will still be cool—this is fine. Place seam-side up in 8-inch banneton or floured bowl. Cover with cloth.
Final Proof (7:00-10:00 AM)
- Room temperature proof: Proof at room temperature (68-72°F) for 2-3 hours. Cold-fermented dough takes longer to proof than room-temperature dough.
Signs of readiness:
- Pillowy, jiggles when shaken
- Poke test: springs back slowly, leaves slight indent
- Noticeably increased in size
Baking (9:30-10:30 AM)
- Preheat oven: One hour before baking, preheat to 475°F with baking steel on middle rack.
- Turn out and score: Dust loaf with rice flour, invert onto steel peel. Score with lame.
- Slide loaf onto preheated steel: Immediately reduce oven to 450°F. Spray loaf and oven walls with water (3-4 sprays). Close door quickly.
- Bake: Bake at 450°F for 20 minutes, then rotate. Continue baking 20-25 minutes more, checking every 2-5 minutes. Target: deep mahogany crust, 200-205°F internal.
- Cool: Wire rack, at least 1 hour before slicing. Cold-fermented bread develops complex flavors over first 4-6 hours after baking.
Notes
Why Cold Fermentation Works:
- Flavor development: Extended time allows organic acids and aromatic compounds to develop, creating deeper, more complex flavor
- Better structure: Cold slows yeast activity while enzymes continue working, improving gluten network
- Easier handling: Cold dough is less sticky and easier to shape
- Flexibility: 8-16 hour window accommodates varying schedules
- Open crumb: Slower fermentation often produces more irregular, artisan-style holes
- Fridge should be 36-40°F for proper fermentation control
- If your fridge is warmer (40-45°F), reduce cold fermentation to 8-10 hours
- If your fridge is colder (32-36°F), you can extend to 14-16 hours safely
- Mix dough at 5:00 PM
- Into fridge by 8:00 PM
- Out of fridge at 5:00 AM
- Shaped by 6:00 AM
- Bake by 8:30 AM
- Mix dough at 7:00 PM
- Into fridge by 10:00 PM
- Leave in fridge until 8:00 AM (10 hours)
- Shape by 8:30 AM
- Bake by 11:00 AM or noon